
Raise Tadpoles & Care of Tadpoles
Care and Raising Tadpoles, Frog and Toad Morphs
 Caring and raising tadpoles of frogs and toads can be fun and educational.
What do tadpoles eat? How long until the metamorph into tiny froglets or toadlets? Learn how to care for one tadpole, or hundreds of them, below.
Caring and raising tadpoles of frogs and toads can be fun and educational.
What do tadpoles eat? How long until the metamorph into tiny froglets or toadlets? Learn how to care for one tadpole, or hundreds of them, below.
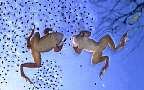
Many species of treefrogs lay their eggs on leaves that overhang pools. When the tadpoles hatch, the pollywogs slide down the leaf and slip into the water below. Other frogs, like the surinam toad; actually cares for its eggs on his back. There are dendrobates that lay their eggs in the water filled cups of bromeliads, others will hide them under damp leaf litter.
The many ways to lay a Frog Egg
Frog families like Eleutherodactylus lay their eggs
on land and their babies are actually  'born'
into miniature frogs, having never
been free-swimming tadpoles! Marsupial frogs exhibit parental care, mostly carrying their
eggs with them. Glassfrogs guard their eggs by sitting next to them or actually on top of them until they hatch.
'born'
into miniature frogs, having never
been free-swimming tadpoles! Marsupial frogs exhibit parental care, mostly carrying their
eggs with them. Glassfrogs guard their eggs by sitting next to them or actually on top of them until they hatch.
 Still other species of frogs actually guard their young, many in fantastical ways.
The giant African bullfrog has been known to "herd" his tadpoles (who
swim in groups like fish) and will even attempt to attack a person who goes
after them! Darwins frog mouth broods the tadpoles for protection. Other frogs watch over their young, laid in bromeliad water cups,
fending off any intruders.
Still other species of frogs actually guard their young, many in fantastical ways.
The giant African bullfrog has been known to "herd" his tadpoles (who
swim in groups like fish) and will even attempt to attack a person who goes
after them! Darwins frog mouth broods the tadpoles for protection. Other frogs watch over their young, laid in bromeliad water cups,
fending off any intruders.
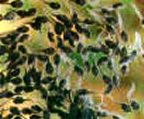
For most other frogs, laying egg masses in bodies of water or to plant leaves underwater and then hopping off, allowing their young to rear themselves, would be considered the most common practice.
After they all hatch, some species hang onto their clear gel-like egg case for hours (up to a day or so, depending upon species) before swimming off. Leave them undisturbed. They are absorbing the remainder of their yolk sacs before they are required to search out their will-be food source.
For more specific species and their actions in breeding mode, see the Tadpole Development page.
Black or White Frog eggs?
 Besides having the jelly-like exterior egg-sac, Frog eggs will contain the "yolk" if you will; that
will become the baby frog. Most all of these yolks are black. Species that lay black or dark brown eggs that are not
fertilized will eventually turn white, in
most cases. Mantellas, Agalychnis, Centrolene and other frog species like some of the foam nesters naturally lay white or pale egg masses, so
keep them out of sunlight until the tadpoles hatch.
Besides having the jelly-like exterior egg-sac, Frog eggs will contain the "yolk" if you will; that
will become the baby frog. Most all of these yolks are black. Species that lay black or dark brown eggs that are not
fertilized will eventually turn white, in
most cases. Mantellas, Agalychnis, Centrolene and other frog species like some of the foam nesters naturally lay white or pale egg masses, so
keep them out of sunlight until the tadpoles hatch.
Watch for fungal infections on the eggs too, as they are a juicy choice for fungal spores. For more on treating frog eggs for fungal outbreaks, see the section on fungus just below.
A funguss amoungg Uss???
 You may also need to treat the eggs
with an anti-fungal liquid like Quat, available in the
Pet Shops. Use a weakened dose (1/3 of the dosage bottle calls for) in the mister.
In the case of egg masses laid on leaves or glass, mist them with the
anti-fungal. This deters fungus infections on the eggs and the total destruction
of all of your former breeding efforts. You can also add Quat (in weakened version)
to the water for those eggs laid there.
You may also need to treat the eggs
with an anti-fungal liquid like Quat, available in the
Pet Shops. Use a weakened dose (1/3 of the dosage bottle calls for) in the mister.
In the case of egg masses laid on leaves or glass, mist them with the
anti-fungal. This deters fungus infections on the eggs and the total destruction
of all of your former breeding efforts. You can also add Quat (in weakened version)
to the water for those eggs laid there.
This is only necessary if you have a very high humidity mixed with living plant and real substrate setup, and most times you won't have to worry about this. Just keep your eyes peeled and check the eggs over carefully each day.

Egg Removal from the Rainchamber
So your frog colony has laid their eggs in the rainchamber. Most egg masses laid on underwater leaves can easily be scooped up in small
new clean tupperware containers, (with the leaves) then gently placeed their tadpole tanks. Read more about moving
the eggs on the Rainchamber page, Moving the eggs.
Break up the Crowd!
 With rare, expensive or cannabilistic frog species, breaking up the tadpoles soon
after hatching is worthwhile. Your odds of achieving success of morphs to froglets
will rise dramatically. Changing of water is also often the "death sentence"
to which tadpoles succumb. Separating groups then, allows you to only
accidentally kill one tank or
cup,
not all. The construction of the tadpole
nursery tanks, or "tad-tanks" is discussed later on in this page.
With rare, expensive or cannabilistic frog species, breaking up the tadpoles soon
after hatching is worthwhile. Your odds of achieving success of morphs to froglets
will rise dramatically. Changing of water is also often the "death sentence"
to which tadpoles succumb. Separating groups then, allows you to only
accidentally kill one tank or
cup,
not all. The construction of the tadpole
nursery tanks, or "tad-tanks" is discussed later on in this page.
Water tests
To properly care for the eggs and tadpoles in water, you should test the water at least every other day.
 Frogs, in general; prefer a slightly alkaline water. But many frogs lay their eggs in water that contains fallen leaf litter, rotting tree branches, and other dying matter. Tree material and leaf litter are high in tannins, which are acidic. The tadpoles of the frog species in these situations are naturally in a PH around 5.
Nitrite and Ammonia can kill your tadpoles at very low levels. Test
for PH, Ammonia, Nitrite and Phosphorous and make appropriate water changes to
influence the proper balances. Also run the same battery of tests
on the water you will be using for the frequent water
changes, and make sure it is the same temperature as the
tadpoles' tank before adding.
Use of the Algae Tanks' water
for these water changes is highly recommended. Replacing the
Algae
Tank with the newer dechlorinized water is a much better alternative
than dumping regular treated water straight into the tad-tanks! Read more about setting up an algae tank
by clicking that last underlined link. NovAqua, when combined with Amquel, removes minerals, chlorine, ammonia and nitrites. Use them to treat water that comes from the tap.
Tadpole Special Requirements Feeding Tables
 Below are links to the tables that will assist you in the approximate times your tadpole
eggs should morph into frogs, and special feeding requirements for certain species of morphs and tadpoles. They are only approximate, as the water quality, water height,
amount of tadpoles in tank, temperature, and food supply factors can all affect
the length of time it takes for your tadpoles to morph.
Below are links to the tables that will assist you in the approximate times your tadpole
eggs should morph into frogs, and special feeding requirements for certain species of morphs and tadpoles. They are only approximate, as the water quality, water height,
amount of tadpoles in tank, temperature, and food supply factors can all affect
the length of time it takes for your tadpoles to morph.
For other species and peculiarities they have, see this Special Tadpole to Morphling Feeding Table, and also the Pollywog to Morph Table
Write it down
 Keeping a daily journal on the feedings, water changes and % of changes, ph,
ammonia & nitrite levels, temperature & lighting, days of eggs to tads to morphs is a great idea!
This serves many purposes.
Keeping a daily journal on the feedings, water changes and % of changes, ph,
ammonia & nitrite levels, temperature & lighting, days of eggs to tads to morphs is a great idea!
This serves many purposes.
You will have a written reference to return to next time you attempt breeding your frogs. It will also help you find any mistakes you may have made and help you to remedy them with the new group. If you are attempting to rear the young of a hard specie of frog to breed and keep in captivity, your journal can provide invaluable information that can be shared with other frog breeders and enthusiasts.
 If you have a digital camera, taking pictures of all the stages of development is also
a great addition to your journal. Take pictures of any sick or deformed tadpoles
or morphs too, this can help with research by you (or others) later.
If you have a digital camera, taking pictures of all the stages of development is also
a great addition to your journal. Take pictures of any sick or deformed tadpoles
or morphs too, this can help with research by you (or others) later.
The need for Oxygen
 Supplying air to each tank is helpful, if it is large enough to call for it. For a few tadpoles, or one you are rasing simply to show a child the wonders of frogs morphing, it is not necessary.
If you're raising a large brood, oxygenated/circulating water will help keep the tank clean and the available air in the water pure. The older the tadpoles get, their lungs will begin to develop, and surfacing for oxygen will become their primary source for it.
For the larger broods though, use an air line. Place it in the center-back of the plastic Nursery tank for best results. I use several clean rocks or stones to hold the air line down and to keep the tadpoles from coming into direct contact with it. Use a small, cheap air pump so the added air is a weak stream, not a billowing, bubbling, earth shaking volume.
 Another benefit of having air line is that they keep the water circulating, which cuts down
on "dead zones"...a place in water where it doesn't move. What you're shooting for
is a slow moving current...not strong enough to displace the tadpoles, but moving enough
to keep detritus from building up. Lack of circulation of water leads to putrid spots,
where pathogens and detritus build up, and toxins like ammonia.
Another benefit of having air line is that they keep the water circulating, which cuts down
on "dead zones"...a place in water where it doesn't move. What you're shooting for
is a slow moving current...not strong enough to displace the tadpoles, but moving enough
to keep detritus from building up. Lack of circulation of water leads to putrid spots,
where pathogens and detritus build up, and toxins like ammonia.
However, you must strike a "happy medium" with available oxygen in the tank. Too much,
and your tadpoles can get "over-gased", causing them to become more bouyant. Some
may even begin to float. You want enough air to slowly move the water, but not
enough to cause
"Gas bubble disease".
For more on how to cure this, should it occur,
click the link above.
The Nursery Tanks
To care for most tadpoles, you will need to provide the watery habitat I am about to describe. For optimum care, these tanks should be set up and running at least 6 weeks in advance of placing frogs' eggs into them.
 For species of frogs laying large
quantities of eggs, at least three tadpole tanks are
best to use for proper rearing techniques. You may also find that the
species laying large egg masses are also quite common, so cull them within 3 or 4 days of hatching! The large and
rectangular, clear acrylic or plastic style storage bins work well as the tanks. Get the short variety, around 18"
in length, and 12" to 14" in depth. Of course, you can always use the common 10 to 15 gallon glass tanks. You will also need a stand to hold them.
For species of frogs laying large
quantities of eggs, at least three tadpole tanks are
best to use for proper rearing techniques. You may also find that the
species laying large egg masses are also quite common, so cull them within 3 or 4 days of hatching! The large and
rectangular, clear acrylic or plastic style storage bins work well as the tanks. Get the short variety, around 18"
in length, and 12" to 14" in depth. Of course, you can always use the common 10 to 15 gallon glass tanks. You will also need a stand to hold them.
In containers of this size, place no more than 30 tadpoles per tank. If you have three tadpole tanks, that makes a total of 90 tadpoles... more than enough for you to learn and sell/add to collection, etc.
For frogs that are more delicate in nature, or are cannibalistic, you can use plastic deli cups, separating them to one each. This method requires a lot of patience and diligence on your part, and although this may cut some losses, the work can become very taxing, another reason one should think through beforehand whether or not they want to breed a particular species.
 One single-bulb fluorescent light strip with an acrylic cover will be
needed for each tank or
area where deli cups are placed. Screw
them into the tops of the assembled cart, so removing the lids of tanks
will not become an electrocution problem. The third fluorescent strip will
need to be attached to the wall behind the Nursery tank, making sure the light reaches the water.
One single-bulb fluorescent light strip with an acrylic cover will be
needed for each tank or
area where deli cups are placed. Screw
them into the tops of the assembled cart, so removing the lids of tanks
will not become an electrocution problem. The third fluorescent strip will
need to be attached to the wall behind the Nursery tank, making sure the light reaches the water.
Use fine mesh fiberglass misquito netting to make tightly fitting tops for each tank. Tadpoles beginning to morph are quite capable of climbing the glass walls of the tanks.
 Also make sure to clean the tank properly. Don't skip this Step!!!!
Newly born tadpoles are very delicate. You can learn how to sterilize/clean
the tank on our Quarantine page.
Also make sure to clean the tank properly. Don't skip this Step!!!!
Newly born tadpoles are very delicate. You can learn how to sterilize/clean
the tank on our Quarantine page.
Finally, after getting the treated water in, and all is ready, you can add Anacharis (Elodea canadenssis) plants for them to hide among if you like. Make sure you have soaked the plants in treated water about 3 days before adding, each day lightly "shaking" the plant under water, then removing all of the water and replacing with new. This will remove any tiny predators that may have been living among the plants that could harm the tadpoles.
The tadpoless will later eat the leaves
off of them. If you collect them from the wild, they may contain viruses, bacteria
and/or harmful zooplanktons, so be sure not to skip the soaking step mentioned above. Look
at them closely before addition to tad tanks, checking for predators like
water boatmen,
water scorpions
and dragonfly nymphs.
How many tadpoles per tank?
 Each Tadpole nursery should be filled to within 3" of the top, with clean, treated
water. Common Frog species that lay large egg masses should
have no more than 20 to 30 tadpoles in each tank. For other amounts to keep
together, see more details on this page under individual species.
(such as 'Dendrobates', etc.)
Each Tadpole nursery should be filled to within 3" of the top, with clean, treated
water. Common Frog species that lay large egg masses should
have no more than 20 to 30 tadpoles in each tank. For other amounts to keep
together, see more details on this page under individual species.
(such as 'Dendrobates', etc.)
Can I add snails to the Tadpole tanks?
 Quick answer? Nope.
Long one?
Snails should never be housed with tadpoles for several reasons. The most
important is because they can carry larval
trematode worms
which can attack the tadpoles and cause deformities. After all the effort and
tireless hours of work you've put in, don't risk it for a couple of snails.
Quick answer? Nope.
Long one?
Snails should never be housed with tadpoles for several reasons. The most
important is because they can carry larval
trematode worms
which can attack the tadpoles and cause deformities. After all the effort and
tireless hours of work you've put in, don't risk it for a couple of snails.
Secondly, they compete for the same food source as most tadpoles. Algae.
Supplements
 It would be wise to add vitamin and mineral supplements to the tadpoles water.
This insures they will develop strong skeletons, skin tissue, organs, eyesight,
etc. Choosing not to add these supplements could be a fatal mistake; tadpoles
denied the proper trace minerals and vitamins can have problems later such as
rickets, leg cramping, intestinal problems caused by under-development as well as
a slew of other health maladies.
It would be wise to add vitamin and mineral supplements to the tadpoles water.
This insures they will develop strong skeletons, skin tissue, organs, eyesight,
etc. Choosing not to add these supplements could be a fatal mistake; tadpoles
denied the proper trace minerals and vitamins can have problems later such as
rickets, leg cramping, intestinal problems caused by under-development as well as
a slew of other health maladies.
To solve this, use a vitamin complex. A popular one among herpers Reptivite or Rep-Cal and is available from your local Herp Supplier. Place one small pinch in for each 10 gallons of water.. Because it is a powder, mix it well in a glass of treated water before adding to the tanks. Add once weekly, after a partial water change.
As an added note, Litoria tadpoles love mineral water. So if you're breeding White's treefrogs, buy some bottled mineral water to use with the tadpoles, or liquid trace elements, found in the salt water section of Petshop. Be sure to cut the amount to use to 1/3 with liquid trace elements.
Water Storage and Water Changes
A brand new 20 gallon kitchen garbage container that you have
sterilized
will suffice as a container (that comes with a tight-fitting lid) to hold water
you will treat and then add to these tanks. You can use
it to hold water that will then go into
an
Algae tank,
or for adult frog's pools and tad-tanks during water
changes.
Water changes in tadpole tanks can be devastating. More froggers have lost their tadpoles due to water changing than anything else I can think of. Therefore, be very cautious and follow all procedures to avoid losses.
 Before adding any water to the tadpoles, make sure the temperature
of the new treated water you are adding is the same as the tadpoles
water. Many froggers bag the water (like when you buy a fish at the Petstore)
and allow the water to float in the tadpole tank for half an hour or so
to get the temperature up to the same. Pour the water in slowly in one corner, so as not to disturb the tadpoles.
Check any sponge filters for debris at this time, and clean off in treated water.
Before adding any water to the tadpoles, make sure the temperature
of the new treated water you are adding is the same as the tadpoles
water. Many froggers bag the water (like when you buy a fish at the Petstore)
and allow the water to float in the tadpole tank for half an hour or so
to get the temperature up to the same. Pour the water in slowly in one corner, so as not to disturb the tadpoles.
Check any sponge filters for debris at this time, and clean off in treated water.
Make sure to buy a good chloramine remover/water conditioner for treating the water. If you are attempting to keep 20-30 tadpoles per tank, do a 15% to 20% water change twice weekly. Small changes done like this will help to keep from "shocking" the tadpoles. If you are keeping 50-75 in tanks around 25 to 30 gallons, do the same.
Tadpole Tank Filtration
 The use of submersible pumps with a sponge filter will work
well with the rearing of tadpoles. Clean the filter about once a week.
The use of submersible pumps with a sponge filter will work
well with the rearing of tadpoles. Clean the filter about once a week.
To do this, unplug the pump, remove the pump and slip the sponge filter off. Rinse well in a bath you have prepared of treated water or water from the Algae tank, making sure to squeeze and twist as you do so, dislodging all the debris you can. Final rinse in another bath of same type of water. Return sponge to pump and replace into tank bottom.Do not clean the filter with tap water! You'll kill the good bacteria that are lodged deeply in the filter.
Also, do not attempt to remove the sponge with the pump left in the tank running. You'll end up killing tadpoles as they get sucked into the powerful pump!
Lights! Camera! Action!
Just like their adult counterparts, your tadpoles need lighting. Use 1 incandescent and/or fluorescent light strip for each tad tank, the length of the tank. Allow them between 10 and 12 hours of lighting each day. Make sure the bulbs have a plastic casing around them so water that sprays up from tank will not touch any electrical parts. You may wish to use fluorescent lighting for no more than 4 hours daily, and use the incandescent lamp in conjunction with and for the remainder of their daytime exposure.
A note of caution: Studies done by 'Proceedings of the National Academy of Sciences', dated in 1997, found that salamanders that were exposed to UVB had higher embryo mortalities than those who had been shielded from UVB.
Heating
You must supply each tadpole tank with a thermometer and a heater. You can use the glass-submersible type heaters with rheostats so you can control the temperature. Temperature should be kept between 72 ° and 82 ° for most species. If for some reason your thermometer says that the water stays between these ranges naturally, you have no need for the heater. (owning them is a good idea anyway, in case the thermometer shows fluctuations below the accepted temp range) None-the-less, each tank will still need a thermometer so you can assure partial water changes are the same temp as the water you will be adding.
An article of interest concerning heating has recently caught my attention. If you'd care to read it, this one's Online. Site: ESA, article: Rate of Weight Loss of Treefrogs at various temperatures and humidities. Author: David L. Jameison
The Hatchlings
 After the tadpoles hatch, allow them to grow
to approximately 3 to 5 days old. If at this time you notice
any with deformed spines or other abnormalities, you should now cull them. This means making up a bath of
triple-strength "Hypno" and placing them in it. Remove the tadpoles
30 minutes later and dispose of properly. See the section on
Euthanizing for proper disposal and
a picture, description of "Hypno". This may sound cruel to some of you, but these
poor little tads would never have been able to have lived a normal life, and most
likely would have suffered far more had you allowed them to continue developing.
After the tadpoles hatch, allow them to grow
to approximately 3 to 5 days old. If at this time you notice
any with deformed spines or other abnormalities, you should now cull them. This means making up a bath of
triple-strength "Hypno" and placing them in it. Remove the tadpoles
30 minutes later and dispose of properly. See the section on
Euthanizing for proper disposal and
a picture, description of "Hypno". This may sound cruel to some of you, but these
poor little tads would never have been able to have lived a normal life, and most
likely would have suffered far more had you allowed them to continue developing.
Feed those pollywogs!
 What do I feed baby frogs and small morphling froglets or tiny toads??? How much do I feed my little frogs and how often do they eat? Where can I find insects small enough for the frogs? Read on friends, read on!
When the tadpoles have absorbed their remaining yolk sacks,
you will now be obligated to feeding the
hungry tadpoles. For the first few hours (up to several days ) they will continue
to use the remainder of their egg-sac as a food source. (as an example, Red-eyed
treefrog's tads take a few days to finish off theirs, so hold off on their meal
for this time. They're also algae eaters) After they begin actively swimming around the tank,
its time to offer them their first real meal. Tadpoles for the
most part are vegetarian, therefore algae consumers. Setting up the Algae Tank
I keep mentioning in anticipation of the tadpoles is a given for these types.
There are, however, many exceptions to this rule, and if you are able
to
view the mouth of the tadpole with a magnifying glass, you should be
able to tell what he needs to eat. The mouth is specially designed to allow the
tadpole to eat what that particular species needs.
If your species is vegetarian as a tadpole, you might want to set up an Algal tank for fresh feeding. This will provide the tadpoles their own natural food source. Instructions for making an Algal Tank are found on the Water 101 page.
If you cannot set one up, you can try fish fry food, wilted romaine lettuce leaf, and best of all, Spirulina fishfood tablets.
Any of the dried foods or leaf-lettuces for tadpoles should be carefully and sparsely administered to the water. If it is still cloudy two hours later, a 10% to 15% water change is in order. Change only one tank at a time, making sure to watch the first one 5 minutes or so to make sure the water was good. If all is well, change any other tanks needing it.
Some tadpoles have special needs. Some even eat their tankmates!
To see if your tadpoles are on this list, see the Table on the Frog-feeding page,
Special Foods Tadpole Table.
And if you'd like to read an excerpt about the very strange behavior of the spiny
reed frog,
Click Here
Feeding Ceratophrys, or 'Pac-Man' tadpoles
 The tadpoles of ceratophrys are carnivorous cannibals. That means the tads
are voracious meat-eaters even at this tender age. Separate them into deli cups, one each; (without the tannins added) and see the feeding table
Tadpole/Froglet Feeding table for food sources for these young predators.
The tadpoles of ceratophrys are carnivorous cannibals. That means the tads
are voracious meat-eaters even at this tender age. Separate them into deli cups, one each; (without the tannins added) and see the feeding table
Tadpole/Froglet Feeding table for food sources for these young predators.
For more info on cannibilistic tadpoles and frogs, see the Tadpole Development page, "Cannibalism"
And since I haven't gone into detail on this website about Ceratophrys, I will just list this here, in our discussion of their tadpoles. Steve Busch has been doing some research on the species, and found that many of them naturally carry chytridiomycosis. to read more on his findings, click here: chytridiomycosis and pacman frogs.
Special treatment for Xenopus Tadpoles
 The tadpoles of Xenopus have a strange but interesting habit of swimming in place, upside down in the water. They also have two antennae. Besides their unusual look, they also have some special
requirements.
The tadpoles of Xenopus have a strange but interesting habit of swimming in place, upside down in the water. They also have two antennae. Besides their unusual look, they also have some special
requirements.
The tadpoles are
filter feeders. They must have about 75% of their water changed daily. This is due
to their unusual feeding habits. Have lots of clean treated water at hand if you are trying to raise
these tadpoles to adulthood. An
Algae Tank
is a very good idea for use with them. The naturally green water from
an algae tank is filled with microscopic living algae, a perfect
food source for xeno-tads.
Do not try netting or handling the tadpoles. If must be moved by some unforseen event, use clean plastic tupperware to lightly scoop them up along with their tank water. Only place about 25 tadpoles to each 8 to 10 gallons for best results and less deaths.
If not using algae tank water, feed them only very finely powdered fry food, and make sure it thoroughly mixes into the water. After about two hours, if the water is still cloudy from the fry food, change about half. This means you have placed too much food in the water, but you'll learn to adjust it as you go. Feed them four times a day, every two hours, and checking every two hours for clouded water. By the end of the day, make sure you have changed the other part of the water, and before you go off to bed, make sure water is crystal-clear, free of food.
Most Morphlings fall into this category...
 Most tadpoles will develop back limbs first, and within a few days to 2 weeks
(depending upon species) the front legs will then follow. They will pop in
and out of their upper layer of skin a day or two before cementing themselves to
the outer skin and becoming permanent. You will also notice them coming to the
surface for air.
Most tadpoles will develop back limbs first, and within a few days to 2 weeks
(depending upon species) the front legs will then follow. They will pop in
and out of their upper layer of skin a day or two before cementing themselves to
the outer skin and becoming permanent. You will also notice them coming to the
surface for air.
At the first sign of back leg growth, begin preparing an appropriate number of tanks for the morphlings to be transferred to. About 8 morphs for each 10 gallon tank is good, and separate by size, smaller ones altogether, larger ones in their own tank, etc. Make sure each tank has a tightly fitting screen top, With the finest of mesh possible. Remember, the bugs these guys eat are very small!
 You can also begin
lowering the water level in the tad-tanks and add a slope and floating sphagnum
moss that connects to "shore". This will allow any tadpoles that
are morphing faster than the others to come out of water if they desire.
You can also begin
lowering the water level in the tad-tanks and add a slope and floating sphagnum
moss that connects to "shore". This will allow any tadpoles that
are morphing faster than the others to come out of water if they desire.
In the new morph tanks, place undergravel plates that fit the
tank bottom snugly. You can even silicone them to the bottom if you like. Just let the glue dry 24 hours before froglets will be placed in the tanks. Then add 3 or 4 paper towels to the top of the plates for substrate.
Add enough water to see the paper towels slightly glisten.
They should be wet but not begin to float. You can also add an inch or so of damp
sphagnum moss
to help keep the humidity held in if you like. However, your insects will be able to hide in the moss, making it harder for the tiny frogs to catch them. Sphagnum moss is required for certain frog species though, like mantellas and dendrobates.
 You
don't have to add the filter plates, but I always do this to guarantee that the tanks have enough water in them that they never dry out. If you have a job or are going to school, you could very likely be gone long enough to allow the paper towels to dry out, thus killing all of your morphs you've worked so hard to get this far. Evaluate your situation and do what you think is appropriate.
You
don't have to add the filter plates, but I always do this to guarantee that the tanks have enough water in them that they never dry out. If you have a job or are going to school, you could very likely be gone long enough to allow the paper towels to dry out, thus killing all of your morphs you've worked so hard to get this far. Evaluate your situation and do what you think is appropriate.
Also add an hygrometer and thermometer to each tank. Keep your eye carefully
on the hygrometer now, maintaining 80% to 85% humidity. Cover loosely
part of the
tank's top with plastic sheet if you need help keeping humidity up.
You can use an
herp heating mat to help maintain the
temperature. It will also help keep humidity up. Use the same temperature range as you do for the adults.
When the tadpoles front legs first pop out of their bodies, move them immediately to the morph tanks, tail and all! Their lungs have developed enough to allow this, and if you wait, they can surely drown.
Feeding & Caring for Frog morphs
If you clicked here from another page link and need to know about morph setup tanks, read the section above first: Most morphlings fall into this category Then read the following:

 Frog and toad morphs will not need food offered to them while they still have their tails. They are
using it as a food source. However, have
pinhead crickets, have
aphids,
have
springtails,
gnats, have
fruitflies or
microworms ready for them when the tails are gone and they begin to stand
like proper frogs. Make sure to keep an eye on their mouths. They will change from tadpole to frog mouth, and this is another sign of when to begin offering them insects. Watch when feeding, making sure every froglet gets his share.
Separate any froglets that are larger and out-competing with the smaller frogs Some species have special food requirements. To see a table listing, Click here.
Frog and toad morphs will not need food offered to them while they still have their tails. They are
using it as a food source. However, have
pinhead crickets, have
aphids,
have
springtails,
gnats, have
fruitflies or
microworms ready for them when the tails are gone and they begin to stand
like proper frogs. Make sure to keep an eye on their mouths. They will change from tadpole to frog mouth, and this is another sign of when to begin offering them insects. Watch when feeding, making sure every froglet gets his share.
Separate any froglets that are larger and out-competing with the smaller frogs Some species have special food requirements. To see a table listing, Click here.
 Watch the tiny guys over the next few months, and change food size appropriately with
their own growth. Keep the insects a bit smaller than the froglets mouths. Keep moving them to different tanks depending upon their size, as some will grow faster than others. Remember, the larger ones will eat more than the smaller ones, so the tinier ones will have stunted growth rates without you doing this.
Watch the tiny guys over the next few months, and change food size appropriately with
their own growth. Keep the insects a bit smaller than the froglets mouths. Keep moving them to different tanks depending upon their size, as some will grow faster than others. Remember, the larger ones will eat more than the smaller ones, so the tinier ones will have stunted growth rates without you doing this.
Keep the paper towel substrate clean and free of faeces, pee and dead bugs. After a week, offer them a shallow pool with treated water, and keep this water changed on a daily basis. You can still use the damp paper towel as a substrate. This makes the cleaning of such a crowded space much easier.
As they grow, lessen the number of froglets in each tank and increase tank size. Also begin to offer them hiding spaces and tree hollows. Pothos makes a nice plant addition.
 You can catch ants you know have not been subjected to pesticides pretty easily. Newly morphed froglets will suck them up! Take
a small glass babyfood jar that is cleaned and dried and place a tiny piece of moist catfood or other moist meat in the bottom near an ant trail. Now put a slightly curled stick or some tall grass blade from near the ant trail to inside the jar, touching the meat if possible. Come back in an hour or so, and you'll have bugs galore! Bring the lid with you, and remove the meat before offering the ants to the morphs. Don't catch red ants, only black or brown ones. Red ants bite you and the frogs!
You can catch ants you know have not been subjected to pesticides pretty easily. Newly morphed froglets will suck them up! Take
a small glass babyfood jar that is cleaned and dried and place a tiny piece of moist catfood or other moist meat in the bottom near an ant trail. Now put a slightly curled stick or some tall grass blade from near the ant trail to inside the jar, touching the meat if possible. Come back in an hour or so, and you'll have bugs galore! Bring the lid with you, and remove the meat before offering the ants to the morphs. Don't catch red ants, only black or brown ones. Red ants bite you and the frogs!
To learn more about tadpoles, visit this page: Tadpole Development
