Learn all about Water
Mother Nature's Helpers
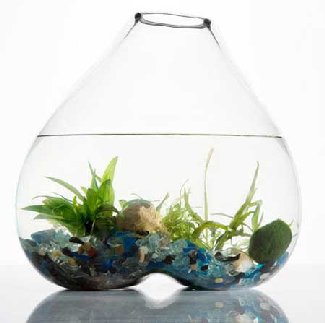 Learn in this very simple lesson, how naturally occuring earth and soilborne bacteria transform unbalanced aquarium type water into clear, animal liveable water in about 60 days using the 'inorganic' style!
In order for any breathing creature to live in a potentially waste filled (watery) environment, that water system must have a way of cleansing itself. This is where Mother Nature steps in. Naturally occurring bacteria that are found in soil and water clean it for you. That is, if you acquire the bacteria and give them a place to inhabit that is cozy for them.
A place to live you say? Didn't you just say they naturally live in soil and water? Well, yes, I said that. But there's a little more to it than that. Don't get nervous, it really is a pretty simple process!
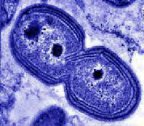
Mother Nature, through billions of years of evolution, has created some bacteria that help to cleanse water, called "Nitrosomonas" and "Nitrobacter". These little guys are the workhorses of all natural water systems, be it streams, ponds, lakes, oceans and even soil; all use the exact same bacterias to stay purified! And just like you, they need some "creature comforts" in order to thrive.
Oxygen is high on the list of needs for the bacteria we are going to place in our water system. They also need a damp, dark place to reproduce. So the perfect "home" we are going to create for them is located in your filter-bank. Oh, and they need to eat too!
How they work
 Now we've learned what they are and where they live. Now,
what do they do, and how do they do it? It's
really quite amazing! The nitrosomonas
eat the ammonia (NH 4) that enters your
water system, via waste materials from your frogs like #1
and #2. This is the first form of waste product found in your tank, before any biological
reaction occurs that can "break it down". That's exactly what the nitrosomonas do!
After they ingest the ammonia and solid wastes, they also have to eliminate
it from their microscopic "bodies". While it was inside them, they changed the wastes into
things that their "bodies" could use, which broke down the toxicity of the ammonia.
When they eliminate it, it is released in a less harmful version of a chemical,
called "Nitrite" (N0 2).
 More to Study...the Biosphere Project: Biosphere II failed over scientists forgetting about the aerobic soil borne bacteria...the exact same bacteria we are learning about right here. Remember, they breathe oxygen too!
Nitrite is toxic, but it is one step down the rung from ammonia. Now the Nitrobacters come in. These bacteria, who live in conjunction with the nitrosomonas, have been 'idle' (suppressed) until the ammonia was turned into a form of "food" that they enjoy eating. The nitrobacters rally up and consume all of the nitrite. When they are ready to eliminate their end waste product, it is released in the chemical form known as "Nitrate".
Nitrates
Nitrate (N0 3) is pretty harmless to all biological life. It can build up in fairly high ppm without causing any stress. If it is allowed to continue building up without a partial water change, it even becomes visible, (with the help of other various microscopic things) to form what is known as "Detritus". In the ocean, detritus can be seen floating softly just above the bottom sands, as a jelly-like, loosely-formed mass. We don't want this to happen in our frogs' tank, so partial water changes are in order. By the way, the nitrate is great plant fertilizer, so when you do the water change, add this water to some of your earthly potted greens. That is, if you're sure that your frogs are free from any diseases, such as chytrid! You don't want to be spreading anything into the environment. (See the RX pages for more on chytrid.)
Where do I get this bacterial cocktail anyway???
Okay, okay, I know your next question. Where do I get these bacteria? Like I said, they live in soil and water naturally. However, we don't want to collect them from these sources, because they could be contaminated with other micro-organisms that could threaten your frogs' health.
A clean, sterilized culture of these bacteria can be found in any large petshop that carries saltwater supplies. They are usually sold in glass vials, with instructions for their use on the back of the package. It's also a good idea to pick up a freshwater ammonia and nitrite test kit while you're getting the bacteria. You will need them when you begin setting up the water and bacteria in the tank. By the way, 'Rid X', used to help help with the freeing up of your home toilet septic systems, simply suspend these bacteria in the mulched paper product they sell you. Don't use these for froggy, I'm just giving you an example as to how the same bacteria clean all waste systems!
Inorganic versus Organic
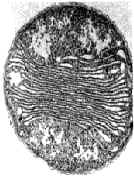 Now lets take another look at what we've learned, because there is a better way
to "feed" the bacteria when first starting to establish a bed of these
guys. It is called the "inorganic method".
The inorganic method means when we are beginning to create a bed-full of the bacteria
to eat the waste products of the frogs, we don't want to harm the frogs by letting
them sit in this water (and create waste for bacteria) while the water is still full
of the toxic nasties! For more on how frogs breathe through their skin, see
 Frogskin is really cool!.
You could add fish to do the job of adding waste,
(called the "organic method") until the bacteria
got established, but there is a better
way. Besides, adding fish to a Frogs' tank or vivarium can be harmful to your frogs!
See the section  Fish and Snails for more
on this subject.
At the same place you purchased your bacteria, you can also purchase what is called 'Ammonium chloride'. This is the synthetic form of ammonia that the frogs would have been feeding to the nitrobacters in the form of liquid waste. Using it not only saves the frogs (or fish) from the high levels of ammonia they'd have to wait through, but it also helps to establish a much stronger bacterial bed. Going 'inorganic' is definitely the high-tech and proper way to set up your bacterial population!
Getting started
So lets move on to the "activation" of the bacteria. First, if you are using well water, treat the water with 10 to 12 drops of bleach per gallon and allow it to sit over a 24 hour period. If you are on city water, just let it rest the 24 hours.
Run-in time
 The length of time it will take for your bacteria to set up housekeeping is called the
Run-in time. During this phase, the bacterium
will initially "eat" the ammonia, eliminate it from their minuscule bodies,
then the nitrobacter swallow up their waste (nitrite) and after digesting it, eliminate it,
and release nitrate.
The "run-in" time is always about the same, and you cannot speed it up, no matter what you do. Because of this, you need to start the water project about 4 weeks before you bring home the froggies!
After the water has rested and cleared, and you have your
 undergravel or submersible
filter/pump up and running, add about 3
ppm
of the ammonium chloride to the water.
Instructions for its' use should be on the package. Now add the bacteria to the water,
the more the merrier. Empty the vial. Around day 3
you can run an ammonia test (don't test sooner, you'll just be wasting expensive
testing supplies) and see if it has dropped to 2 ppm or below. If so, add another
dose of the ammonium chloride. If not, don't panic! Your bacteria are still munching
on the first batch, and will be done with it shortly.
In this case, test the next day, and within a couple of more days the ammonia will be
less than 2 ppm and you can go to step 2.
 Now, every other day up until day 10 or so, test the tank and
add ammonium chloride as the levels drop below 2 ppm. Around day 10 you can also
begin testing for nitrite. Levels should be arriving in the 5 ppm to 10 ppm range.
Also at this time, drop the dose of ammonium chloride by half. At approx. day 15
you should see nitrite levels climbing. Add another half-dose of ammonium chloride
(you still have to feed those hungry nitrobacters!) The nitrite levels will likely
peak around day 20 or so. By the 25th day, they should begin to taper off and by day
30 they should peak and fall. Now do a 50% to 75% water change, making sure you have
pre-treated the water! Wait overnight and then you can add your pets.
If you don't have the frogs yet, you will need to keep feeding the bacteria, so add some ammonium chloride every few days until the pets arrive. Just remember to do the big water change before adding them.
The bacterial Housing projects
 Where are the bacteria, you ask? Good question. When you initially added them to the tank,
they made a dash for your filter/pump. If its' an undergravel, they are sitting there,
in the
  gravel, breathing in the fresh air as it passes by the plates. The darkness and
detritus the gravel provides gives them the perfect 'housing' they desire. If you have a
carbon filter or submersible with
a sponge, that's where they are. They need the fast-moving flow of water that brings
fresh oxygen to them, and the carbon or sponge provides tiny pits, nooks and crannies
where they can sit down and suck up all the ammonia and nitrite as it passes by them.
If you have an ECLIPSE system, or another filter-type that uses a 'bio-wheel', they
are there, in the folds of the 'wheel.'
What all that means is if you decide to 'trash' your carbon because the package it came in said its' only good for 6 weeks or so, you might well be throwing out all of your hard work building the bacteria bed as well! I highly suggest you re-think throwing out a carbon filter if its' your only source of filtration in the tank! If the carbon is in a bag, then open the bag and only remove half of it, replace that half with fresh. A sponge filter???? Don't make it your only filter option. The other way you could go here (with the sponge) is to dip it and squeeze occasionally in clear, pre-treated and aged water. Same goes for the 'bio-wheel'. Never place it under tap water! (You shouldn't have to ever rinse a bio-wheel anyway, as the carbon pre-filter should trap anything that could potentially clog it) This way you aren't killing your bacteria. They'll stay inside the sponge and survive to eat another day.
Water Treatment
 Buying Clorox bleach is the first step in water treatment if you are using well water. Use 10 to 12 drops per gallon for use with each gallon. Let it sit overnight, in an open, clean pail, preferably with an airstone attached to a pump. Then begin the other processes mentioned on this page. This allows for the water that has been underground to be cleansed of bacteria and viruses that are naturally in it. (Like the dreaded chytrid.) And believe me, they are there! Then you can use the Amquel and Novaqua.
Buying a good Chloramine remover is the first step in treating tap water. You don't have to treat city tapwater with bleach like you do for well water, because it's already been treated at the water management facility. A Chloramine remover breaks the chemical bonding of ammonia and chlorine that are added to your tap water at the City treatment centers and allows the nasties to leave the water. Let the chloramine-treated water sit over night before using. This allows any extra aeration that was in the water from the city to subside, as well as any other dissolved gases, the chlorine and ammonia.
For reference to chytrid, water, and frog dieoff, please view this article by National Geographic.
 NovAqua is a great Water conditioner, and should be used in conjunction with
Amquel, your Chloramine remover. Storing water for future use is addressed on the
page Tadpole Care,
  Water Storage. Clicking on
the above link you just read past is a good idea. This way you can always have some
good, treated water ready; a practice followed religiously by Saltwater
Enthusiasts and all good Froggers.
Bacteria will begin to grow in stored water. To cut down on it's growth, always store jugs in a cool, dark space.
PH
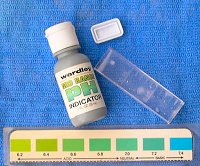 PH
stands for 'Power of Hydrogen' (Hydrogen being the chemical symbol for water)
and knowing about the 'PH scale' is important for several reasons. Basically,
PH is a good indicator of the quality of your water. If you do regular water changes
with treated water you most likely keep the water in good balance.
PH
stands for 'Power of Hydrogen' (Hydrogen being the chemical symbol for water)
and knowing about the 'PH scale' is important for several reasons. Basically,
PH is a good indicator of the quality of your water. If you do regular water changes
with treated water you most likely keep the water in good balance.
PH is a scale used to measure the alkalinity or acidity of water. The highest number on the PH scale is 14, this being Alkaline. The lower number is 1, and this of course, would be Acid. The center, or 'balance' we look for in Freshwater is between 6.8 and 7.0 in most cases. 7.0 is generally considered neutral. Most species of frogs prefer a tad to the alkaline side, say 7.1 to 7.3.
Measuring PH of water is easy. It can be done with PH test strips, or paper, liquid PH indicators, and even an Electronic PH meter. Balancing agents are available at Pet stores that carry Fish supplies. Purchasing a small PH test kit is a good idea. You'll probably use more of an Alkaline raising agent than Acid, as PH tends to always seek to lower, becoming more acidic than alkaline, so pick up a couple of bottles of it when buying the test kit.
In a pinch, you can use Arm and Hammer's Baking Soda to create an alkaline base in your freshwater system. Make sure it is not scented! Addition of any agent should be done with caution. Use only a very small amount of Baking soda, it is quite powerful and too much could instantly kill your frogs!
For that reason, I suggest you test the water to be used for your frogs. Add the balalncing agent, swirling, let settle about 3 minutes. Then use a test strip to measure the new alkalinity/acidity of the water. Shoot for 7.1 to 7.2 on the scale.
 PH degrades as time goes on, so when you are storing jugs over
2 weeks old, retest before using.
For more in-depth conversation on PH, I have provided the following link. The page is written more for Fish enthusiasts, but where water is concerned, the information is quite helpful for Amphibian keepers too. Notice the table which gives you ranges fish and mosquito larvae are able to live in. PH Measuring
Become a Scientific Researcher
As you may have already read on the Breeding page, I'm a big fan of keeping journals. In the case of setting up your bacteria, I suggest it as well. It is important for you to know the amounts of ammonia, nitrite and nitrate that is in your tank as it "runs-in". You should also keep track of how much ammonium chloride you added, and when. Making a partial water change of 50% should be written down too. Keeping the journal can help you to understand if anything goes wrong. (or right) It will give you a better grasp on how to handle any potential problems should they occur. Continue keeping the journal long after you have finished establishing the bacteria. Knowing when you tested, what you tested for, what your results were, etc. all make you better at keeping the perfect balance. It can also help "show" you how or when a rogue bacteria or virus got into the system!
Changing Tank Water
 After you get everything above done, understood and in place, you'll need to change the
water in your Aquatic tanks on a regular basis. Of course, follow this for the pools
and waterfalls' water in terrestrial frog vivariums too.
Most Aquarists change about 20% of the water in their tanks once a week. This is easy enough. Just look at the front of your tank. Now imagine 5 equal horizontal lines drawn across it. The space in between one of those imaginary lines is about 20%. That's how much you'll be changing. Use the treated water you have prepared to do this.
If you use a well and septic tank on your property, you must treat all of the water you are going to throw out. Use the 10 to 12 drops per gallon method, allow the old tank water to sit an hour, and then dump down the toilet. If you are in the city and the water is recycled, just dumping it down the toilet is just as dangerous to the environment. The reason is that your septic system will not remove all traces of chytrid and other viruses or bacteria that may have gotten into the water while you were using it, and you don't want to recycle that back into the environment and possibly kill wild frog populations. treat it as with well water.
 Pipid frogs like dwarf clawed frogs and xenopus frogs should have their water treated as you read above. You'll be changing water more often. Please don't forget the 10 to 12 drops per gallon bleach treatment before releasing this water back into the environment!
Don't get lazy about this, poor water quality allows for an acidic
 PH, and a buildup of
harmful metals, nitrites, ammonia and a whole slew of other effects. Old, used water
cannot
buffer itself as it could before, as it is in a closed system.
While making this change, be sure to first know the temperature of the water you have in the tank, and make sure the treated water you will be replacing it with is also the same temperature. If you're just on 'room temperature' in the frog's tank, then be sure to store the treated water in the same room. That way, they'll both be close to (if not) the same temperature already.
And be sure to read the thoughts on tap water below.
Thoughts on using Tapwater & other Water sources
 Scientists have found metals heavy enough in our regular tap-water to cause
paralysis in frogs. (And this water is below the EPA standards too, still affects
frogs) Nitrite may also be present in tap water at a high enough rate to affect
frogs. Now they are even discovering human medications in water ways and even drinking water, which some people now speculate may be causing the deformed frogs found in Michigan...so think about your water source for frogs!
 Rain water can be substituted when available, but you must check it for PH, as
Scientists have been warning us for years about infamous 'acid rain'.
You must remember, should you collect rain water, it must be first trapped in a non-metal container. Don't place your plastic bucket under a metal drain spout. Just the mere contact of the water with that metal will leave trace metals from the pipe in the water, potentially harming your frogs.
Well water should also be tested for trace metals and other contaminants. Over 40 states have released warnings about eating the fish in their lakes; due to mercury and other heavy metals. Fertilizers and weed-killers can make it into ground water sources too.
A simple Water conditioner/chloramine remover isn't usually strong enough to remove heavy metals.
But you can fight back...a water conditioner named

 'Amquel' in combination with 'NovAqua' in
your frogs pools and pipid tanks will do the trick. If used together, they do remove metals.
Alternatives to these conditioners are things like 'diatomaceous earth' and ion exchange resins. The use of either of them alone as a filter medium will remove metals from water.
Interestingly enough, diatomaceous earth isn't really "earth" at all. Instead, it is made up of finely crushed diatom skeletons, which are "ocean plankton". These particles are then small enough to trap the microscopic particles of metal in the water.
Diatomaceous earth requires some knowledge on it's usage. And it would require you being able to buy and place another filter on your treated water container. If you have a lot of animals requiring this, it is worth the expense and space.
Ion exchange resins are expensive to start with, but the great thing about them is that they recharge easily. They also pull the metals from the water. An excellent choice if you want to take water cleansing a step further. Xenopus frogs are very senstive to certain metals, so if you are keeping them perhaps you want to try some ion resin.
If none of these solutions are things you want to consider, perhaps going with bottled spring water is the way to go. At the least, 'NovAqua,' combined with 'Amquel', can remove heavy metals, and break the bonds and dissolve chlorine, ammonia and chloramines.
I personally use an Algae Tank, which is listed right below this topic. This way the water is as pure as it can get, and closer to what the frog would have had in nature than chemically treated waters.
An Algae Tank
This subject has been placed here because it deals with cleaned water through the use of algae as a filter. I use it not only to create clean water for water changes, but to feed my herbivorous tadpoles. It is a supplement to the tadpole page, but because it deals with natural filtration of water, it has been placed here on the Water 101 page.
I use an Algae tank for any of the frog species I will be rearing that are herbivorous. This is not required for use with tadpoles that are cannibilistic or require a carnivorous diet. However, a good point to mention here is that the water coming out of this tank will be naturally sparkling clean and perfect for tadpole tank and frog pool water changes...you may want to set one up just for water changing.
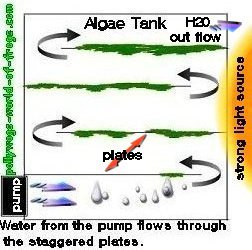 For optimum use if only for tadpoles, set up the algae tank a few months before the
tads are expected to arrive. The largest tank you can afford is best, with
plenty of exposure to natural sunlight.
After you have the tank, measure the inside from one side to the other. Now cut thin acrylic sheets (three or four) to just 4" or so under the width measurement and just over the will-be water height. Use a dremel or medium sized bit on a drill to bore 10 or so holes through-out the acrylic sheets.
Now stagger the plates, making one kiss one side of the tank, and the one next to it kisses the opposite side. Mark with a marker where you will now have them, including up the side of the tank they will be adhered to. Remove the acrylic plates and run a thin bead of aquarium silicone along the marks, and carefully set the plates into them. You can use blue painter's tape to steady them while drying. It will later peel off easily. Windex will also cut any silicone off of your hands or the tank glass where you may accidentally get it.
After allowing to set up 24 hours, thoroughly rinse the tank out with clean water.
Place a strong canister filter pump or submersible (your choice) pump on it, making sure
that the pumps flow will be pointed at one side towards one of the plates. Make outflow of water at opposite end of tank, and recirculate back to pump. Fill the
tank with water, again; making sure the tank is located near a very sunny
window. If possible, a hood with strong lighting is also good. Turn on the pump
and check to see that the flow is strong. The water should be weaving through the
plates nicely if all is done right. Remember, the stronger the waterflow, the longer your algae mats will grow. Feed the tank aquarium plant food, or 
 phosophorous every few weeks to keep the algae growing.
Next, sit back and relax. You don't have to add anything more. Depending upon how intense your lighting situation is, within a week or so you will see algae begin to flush across the glass and acrylic plates. As time goes on, this algae will grow into long flowing mats. This not only makes for great tadpole food, (cut the living algae mats as you need to feed) but the water is the purest, cleanest water you can use when making any water changes. It can also keep you from having to buy expensive spring water, which many froggers do; for all of your other frogs water needs.
Important: When you are ready to add to the water to the tadpole tanks for a water change, first place the apportioned amount inside a clean, never used (unless for water changes) plastic garbage can. Add an aerator stone (attached to an airpump) to the plastic can for about an hour before using in the tank. Aerate. Then remove the stone, and allow the water to sit an addittional hour before using in the tadpole tank. With full grown frogs, you can skip this step.
The reason for this is simple. Algae eats oxygen, and emits Co2. You will need to add the oxygen back to the water before using it with your tadpoles.
Well, I hope that I have made this reading understandable by all, as it is so vital that one grasps the importance of clean, organically-charged water systems, whether you are keeping frogs or fish! For the younger crowd, there is also a neat website called Dirtland Microbial Zoo that has some cool stuff about nitrifying bacteria too. Parents, show your kids this site to give them a greater understanding of water and soil filteration!

 Gravel is recommended when trying to establish a bacteria bed.
Use this with an undergravel filter. Sand stays more
'packed down' and does not allow enough
air and fresh water to move through it, which in turn cuts down on the amount of
bacteria that can survive there. If you are keeping African clawed frogs, larger riverstone is recommended. These frogs tend to eat anything,
and swallowing a piece of gravel could impact/kill them. Riverstone can be found
in your local Garden Shops. Rinse it well before using to remove debris and sand
particles.

 Phosophorous becomes available in the
Algae tank when you feed the tank
aquarium plant food. Algae "eats" it. You must make sure they have consumed
it before transferring the Algae Tank water to the tad-tanks. This is why the
test for phosphorous becomes important. So not only should you test the
Tadpole tank for phosphorous, you should also test the Algae tank for
phosphorous before using it as a water change for tadpoles.


