Frog & Toad Vivarium or Tank Setup
Tank Size
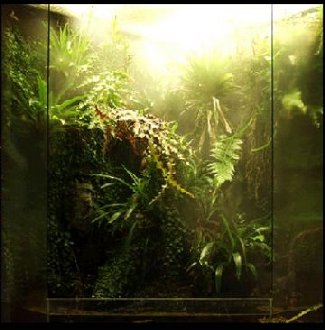 Although frogs really should have their home requirements measured out in cubic inches, the pet trade sadly does not label up and sell herp housing in this manner. So we'll have to use gallonage. With fish,
the rule of thumb is '2 1/2 to 5 gallons per fish', with the former being the
most used formula. This would be harder to do with a terrestrial frog!
However, we can adapt it a bit and come up with a working idea for our pets too. I am a firm believer in the largest aquatic tank or vivarium that you have the space and money for. The more room your pet has, the less stress he will incur. You will also lessen the chances of infections and diseases inhabiting your set-up. These nasties like a cramped, overly wet place to breed. Cooping up your frogs will only create a 'swamp bed' you and your toads will come to regret at a later date.
So, let's start with roughly 10 gallons of space for each frog.
This insures that the frog can complete a leap or two without
reaching the other side. Of course,
if you are keeping a frog that grows to any size, like a bullfrog or pixie frog,
I suggest starting with a 100 gallon. Additional of these two frog species should add at least 25 gallons per frog. The last thing one should remember when choosing the size of tank, is that many male frogs among the same species are territorial, and require extra room if you keep more than one.

 Bombina, a small toad that's good for beginner's; is an example of an amphibian which tends to be aggressive when not given enough space.
Tank Construction
 The frog family you have decided to keep will also help dictate
the way the tank should be constructed. If you are keeping a pet like a
green frog, you need a tank that is wider than it is tall. These frogs do not
climb and also need a good sized 'pool' of water to lounge in, along with an
earth 'bank' to sit on.
If treefrogs are your passion, you need a vivarium that is taller than wider. Treefrogs still need a pool of water on the tanks' bottom. The tank must be of enough size to have a sizable soil area and still allow for a pool large enough for all the frogs to soak in should they wish to.
Dendrobates, peepers and other smaller frogs can be placed in smaller tanks, but never go for anything under 20 liters to house your frogs in.
If space is an issue, perhaps you should honestly reconsider keeping a frog in the first place. Without adequate housing space, you'll most likely end up failing; killing the frog and causing yourself grief.
False bottoms
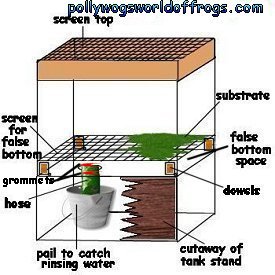 In order to better regulate humidity and keep vivariums clean without total disassembly,
many herpers use tanks with false bottoms in them.
This allows for good drainage of any extra water that can (and will) accumulate
in the tank, souring any soil and/or allowing for toxins to build up.
It also allows you to strongly spray some of the nasties like frog pee (ammonia) and frog fecal matter out of their
main living quarters.
If you have bought a standard sized fishtank to use, finding and purchasing an under-gravel filter plate set can be just what you need to do this. Make sure it is a snug fit. Remember, many terrestrial frogs like to burrow. Gaps can get them caught underneath the plate, and they will one day "mysteriously disappear"...only to languish and die under the floor of their vivarium.
 If your tank is custom, try using the plastic screening
found in the drop ceiling dept. at Lowes.
For both standard and custom size tank, purchase a new plastic 2 1/2 to 5 gallon bucket (depending upon vivarium size). At your local Lowes, you can purchase the the proper length of 1" diameter clear plastic hose (in plumbing dept.) Also get two rubber grommets that fit snugly over this hose's end, glass cutters, a sheet of fine sandpaper, four 1/2" to 1" cuts of dowel, and a roll of blue tape.
At home, turn the tank upside down. Pick a back corner that will be convenient for you to use as a drainage spot. Place three or four short lengths of blue tape over this area. Now with a permanent marker, draw a round circle just a 1/16" smaller than the outer measurement of your plastic hose, over the blue tape.
 With new-blade in glass cutters, cut inside the mark left by the permanent
marker. Making sure it is completely cut through, tap out the inside
circle gently until you feel it break free from the tank's bottom.
Remove the blue tape and the cut-out circle of glass. Wrap carefully the glass into blue tape and discard properly. Lightly sand the inside cut area with your sandpaper, being sure not to cut your fingers as you do. Place one rubber grommet onto the plastic hose, about 1/2" to 3/4" below that end. Now take the opposite end and feed it through the tank's inside.
Now the 1/2" to 3/4" should be sticking up just above the inside of the tank's bottom. (you want the length of hose under the tank, not in it!) Adjust the grommet to a height that will allow the undergravel plates to lie flush with the tank bottom.
Feed the other grommet through onto the other side of the hose until it reaches the underside bottom of tank. Pull it back slightly and place silicone glue onto the glass where the grommet will sit. Push the grommet up into the silicone. Repeat this process for the grommet inside the tank. Let dry 24 hours before attempting to touch.
After 24 hours, place the underneath end of the hose up and into the tank (to prevent drainage) and test your seal by adding water. Wait a minute or so and check for leaks. If any arise, drain, make sure working area is dry and reseal, waiting another 24 hours. Silicone glue a round-cut piece of fine screen mesh to the top of the plastic hose that is inside the tank. Dry 24 hours.
Now flush the tank out completely from the inside with fresh clean water, to remove any glass filings that may remain.
 Add the 4 dowels just a bit inside each corner of the tank. Glue bottoms with silicone and let sit
about 2 hours before proceeding. You can now add carbon to the
space at bottom (under dowel height) to help absorb odors and give beneficial bacteria
a medium to live in if you so desire. You can even add an air pump hose to the carbon-layer,
so that fresh air can be pumped under the plates to hinder the growth of anaerobic
fungi and bacterias.
After dowel's glue has begun to set up, place undergravel plates (or
a custom sized screen bottom you have framed in 1 x 1's)
into the tank,
Make sure filter plate(s) sit on the top of the dowels. Then add
a layer of pea gravel that is thoroughly cleaned, to top of plate and then other
mediums mentioned in the  Substrata section.
Place the lengthly end of hose into the bucket and under the tank. Now whenever you wish to flush it out, all you have to do is make sure not to over fill the bucket...and toss out the dirty water!
For larger set-ups, creating the filter plates yourself is really simple. I like using the black or white plastic mesh. It's sturdy and still flexible enough for you to work with. You can find it Lowes or Home Depot. As mentioned above, look in the drop ceiling department for this.
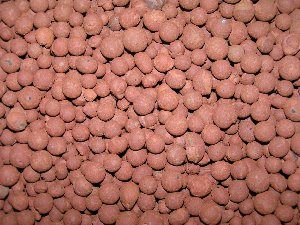
there are other materials and manners of making false bottoms. I've described one way. You can use LECA (Light Expanded Clay Aggregate) or Hydroton. EdsFlyMeat.com offers it online at a good price, with instructions on it's use.
Lighting

 There are several varied opinions on the lighting of frog set-ups.
Froggers seem to debate over this subject more than any other. How much
'UV' or how little 'UV' is still a toss-up in the ongoing discussion concerning
lighting for
diurnals
and
nocturnals.
I will discuss then; what has worked well for me.
When shopping through for lighting, your going to run into terms like 'UV' UVA, UVB and 'Incandescent'. Learning about all of the lighting spectrums can be helpful to you, and much depends upon what type of frog you're keeping, and perhaps even where you live.
Naturally, treefrogs live in trees. Even though many are nocturnal, they are still getting more exposure to UV than a frog that lives on the forest floor. If you have treefrogs, try a full spectrum UVB fluorescent. Place it on a timer to come on for two to four hours daily. This lighting has also been shown to help maintain and promote good bone growth in reptiles. Use at least one daylight fluorescent and one UVB fluorescent light on treefrog style vivariums. The larger the set-up, the more lighting you will need to cover all.
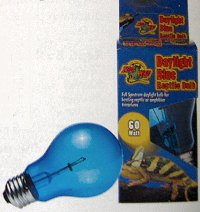 The above will also work well for most terrestrial frogs and nocturnals. Using UVB spectrum with these varieties promotes good bone growth. As both of these
types of frogs will be lower in the terrarium, the lighting will filter down enough to provide the adequate amount, as well as become deintensified. This is providing that you have well stocked plantings and the proper substrate for burrowers in your vivarium. If you're going with a paper towel substrate, almost bone-bare of vegetation, or dealing with tads or quarantining, I would not advise the use of UVB until they've morphed a few weeks or are out of quarantine and are in properly planted tank.
 Incidentally, Frogs that are not given lighting, or it's simply not that important to their keeper, (so they receive very little) seem to me to stay a deeper color, and not show so much the richer, brighter hues found amoung that species. I personally believe in good lighting. Here's an article from Science News in 2007 that has some interesting developments on just that
Always keep the tank out of direct sun, whether it is a vivarium or an aquatic set-up. The sun can raise the temperature of the tank to levels that would essentially 'cook' your pets, and the over abundance of ultra-violet light could also burn their delicate skin. Bright indirect sunlight is very acceptable.
There here are a handful of diurnal frogs that actually sit in the direct lighting of river banks. Greenfrogs, or rana clamitans, and the giant American bullfrog both come to mind. So do leopard, mink and wood frogs. I used to watch them for hours on end, sitting at the ponds' edge in direct sun, waiting for a stray insect to wander by. In a captive environment, I would supply them with a basking lamp, fluorescent, a plant bulb, and bright indirect sunlight for at least 10 hours each day, 7 months of the year. In fall and winter months, cut the hours of lighting down, as these animals would be hibernating if in the wild.
Some other popular anuran diurnals are pac man frogs, poison arrow frogs, fire bellied toads, atelopids and mantellas.
 Incandescent lighting can help to add heat. If you're living in a northern climate,
where winter becomes a reality, the addition of incandescent could help in balancing
off those cold temperatures in the vivarium. Certain species of frogs like to "bask"
too, such as the phyllomedusines. Adding a basking lamp to one corner will greatly improve
the health of these types of frogs. Just make sure to have two thermometers, one
in the cooler side of tank, and one at the hotter side, to insure the vivarium is
not overheating. Incandescent bulbs are used in basking lamps.
Be sure the lamps are not directly exposed to the frogs; they can leap up and you don't want a french-fried frog on your hands! Cover the bulbs with acrylic or glass to protect the frogs. If it has to be inside the vivarium, make an acrylic cover (for fluorescent) or heat-proof fiberglass mesh (for incandescent) around the bulb.
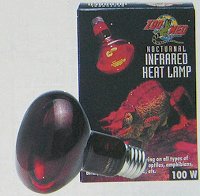
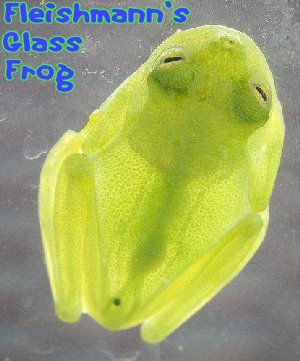 If you're keeping nocturnals and want a better look at them when they're awake, you can use one of two different strategies. Most opt out for an incandescent red light,
clipped onto a corner of the tank and turned on when the sun goes down. It doesn't
affect the frogs, (it is presumed that they don't see red light) and provides you with enough light to watch them as they go upon their nightly treks. You can also buy a
fluorescent bulb called "Moonlight" that offers the eerie glow seen only by those who haunt the night.
A note of caution about UVB in regards to frog eggs, tadpoles and the tiniest of morphs: There have been studies that show embryotic stages of amphibians can be genetically damaged by too much exposure to UVB. This makes sense...these animals spend their larval stages under water in most cases, and water tends to de-intensify light. The tads also seem to hang out in the more planted areas of pools and streams, or underneath mossy rocks. So don't over use it when rearing tadpoles. The adult frogs, however, have been proven to show benefits to bone growth and overall health by limited exposure to UVB. All of my adult frogs get around four hours a day, and all have been fine healthwise.
For more about UVB onsite, visit The Frog Pond News page.
Frog Proper Lighting
Below is the link to a lighting table found in Zoo Med's lighting guide.
Frog Vivarium Lighting TableTank Cover
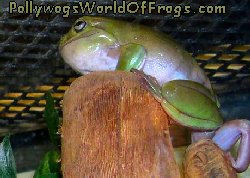 The top of the tank is one of the most important things you have to look after
in the keeping of frogs. They are quite curious, agile animals that will attemt
to escape their tank at one time or another. Therefore, a snug fit is crucial
to the life of your frog.
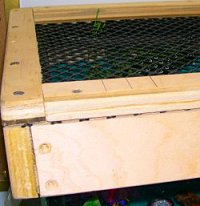 If its' an aquatic tank for aquatic frogs, the plastic top containing lighting that comes with
that particular tank size is usually okay. Make sure there are no spaces at that
top where he may wriggle out. Even the smallest space can allow a frog 5 times
larger than that hole to escape. If you find gaps and spaces where airline tubes
and cords enter the tank, use pieces cut from a milk jug and sanded smooth with a coarse emery board to seal. Aquarium silicone glue will do the trick.
If your frog has a terrestrial setup, you can use the screen type tops. Again, make sure that it is a tight fit, and there are no spaces left open where airline tubing or electrical cords are coming out of the vivarium. If you are using fluorescent lights, they should add some weight to the top to hold it down. If you feel it is not heavy enough, weight those other places with large rocks. Frogs are much stronger than you may think. If he can get his wrist underneath the top, you have trouble!
Heating
 Frogs for the most part; like a warm day and a cooler evening. A good drop in
day and evening temperatures stimulates the frog, and makes him feel more at home.
It is even required that temperatures change when
cycling
your frogs.
Because frogs are so-called "cold-blooded", (See Did you Know? to your right) some of them like basking. Basking lamps are available for this purpose. Make sure the frog cannot come in direct contact with the lamp, and also make sure it is not over-heating the vivarium. You should do this before adding the frog(s). The Caresheets in the menu bar can help you specify your specie's needs.
Incandescent (which can also be basking) lighting can help you keep the temperatures up in the day. Turning them off
at night should allow for the strong temperature drop most frogs like. Make sure to keep a couple of thermometers in the tank where they are easily readable by you. Place one
near the lamp, and the other furthest away from it. This way you'll be able to measure the temperature changes throughout the tank.
 Never allow the temperatures to go above 90 °
in a vivarium. Even tropicals don't like this much heat, and in a tiny tank, this can be disastrous.
If you're planning on an outdoor set-up, you should make sure that it is planted well enough to allow the frogs constant shade/protection from direct sunlight. Make sure that it does not receive direct sunlight for long periods of time either. 2 to 4 hours is all that's needed if you're keeping tropical species with sun-loving plants. Placing acrylic on three sides of the tank can protect it from too much temperature drop in evenings. Monitor temps in outdoor enclosures carefully, keeping them in ranges acceptable to that species of frog.
If you're up north, this set-up needs to move into a warmed area in winter. Perhaps you have a warm garage that is not exposed to car exhaust, oils or other chemicals. Maybe you can roll the enclosure into an insulated shed. If it's drafty, you'll have to close off the point of draft-entry. Frogs don't "do" drafts, it can make them sick, even kill them. Check the temperature of the shed or garage by placing a large dial-style thermometer in the coldest area of it. Make sure your frogs are not exposed to temperatures under 62 °, to be safe. Tropicals exposed to long periods of 62 ° will suffer, so basking lamps will be needed in that scenario.
Humidity
 A tank that has a screen-top is going to allow for a lot of humidity escape. This
is something you are going to have to calculate for yourself, by watching the
tank on a daily basis. (A small amount of fog on the glass is fine, just not
soaked!) Also
remember, fog on the glass from overnight is natural. It should clear away when
the sun comes up. You will know you have struck the right balance when the plants
are doing well, with no water droplets dripping from their leaf-tips
and not rotting and turning yellow.
Purchasing an Hygrometer is important in that it measures humidity. Some frogs like 30% humidity, while other species like 70%. When you order your frogs from a Breeder a proper Caresheet with this information should be sent to you with the frog species. If you need to see one now, visit the Frog Caresheets page for a list of the ones I have.
 Depending upon your species, the frog should look like it has a matte finish
from the moisture. One of the exceptions to this are your phyllomedusines, which
prefer less humidity and have more of a waxy sheen. My Litorias like to bask, and also
naturally get a waxy look to them on occassion.
If you ever see any types of fungus growing in the tank, slightly cut down on the moisture. This means you've probably got too high of a humidity. You can remove the fungus if you like (although most are harmless). You should remember, the eco-environments where most frogs live also accomodate fungi.
This is where a

 false-bottom tank comes in handy. If fungal problems persists and is not appealing to you,
a very good product named Quat will aide you in doing the trick. Just don't overdo it.
If you need more moisture, try using a pre-cut sheet of acrylic or glass that fits
very loosely on top of screen to help hold more moisture in.
Some frogs prefer drier climates, and you should allow for different temperature ranges within the tanks. Placing a Basking light on one side will allow for this change. This way, the frogs who like it a bit drier/warmer can migrate to the part of the vivarium that suits them, and still get to a cooler area if they need to. Never place a basking light over their pool. It can heat up the water too much for their use.
Fog Machines
Ultrasonic Fog making machines can be very useful, if used properly. Just be careful to place them inside tupperware large enough to cover them with water, and place screen over top, securely. This way your frogs will be protected. They automatically shut off, so will not burn out when run out of water. You can also remove it entirely from the Vivarium, and pipe in the fogged air. This removes any threat for the frogs and still gives them the humidity they seek.
Petshops also sell fog machines that are installed right inside the waterfall. These emit the fog outside of one of the cascading tiers. I have some of these. The opening is small enough that my larger adult frog species cannot begin to get in. But juvenile frogs, or another smaller species, may be able to. Just be sure your frogs cannot get to the fog maker. Froggers have experienced losses through electrocution when their pets come in direct contact with the fogger.


